Step 1
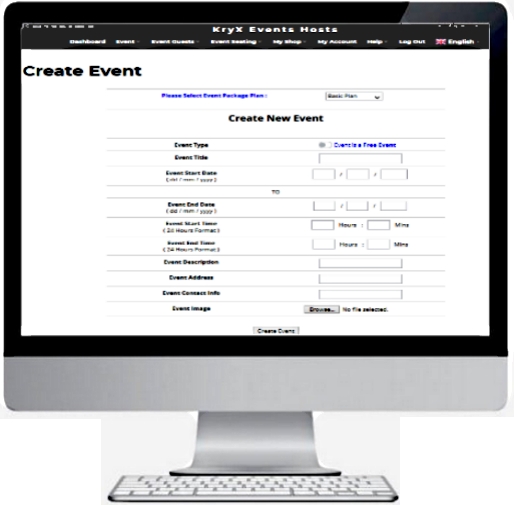
Sign Up for KryX Events Hosts Plan according to your Event needs. Start creating your Event by filling in your Event Details such Event Title, Event Venue, Event Start and End Date, Event Timing. You may even include your own Event Banner Image that will appear in your Event Registration Page.
You may create both FREE or PAID Events.
As KryX Events do not handle any form of payments and we do not charge any fees for ticket payments, You will have to provide your Own Event Payment Link for registered guests to make payment to you.
You may create either Public or Private Event.
Anyone with a Public Event registration link will be able to view the event details and register to the event.
A Private Event registration link will require the event password in order for anyone to view the event details and register for the event.
You may select Event Mode for Virtual Events.
Virtual Event will require you to enter your Virtual Meeting Link with optional password. Only registered guests with assigned seating will be able to view the virtual event details.
You may set your Event Capacity as required, within the Plan Guests Limits. You may also edit the Event Capacity across time, thus allowing you to release Event Seating in Phases according to your planning.
Step 2
Setup Guest Category for your Event if needed. This allows you to assign your Registered Guests into different groups for easier management.
An example will be a Wedding Event, and your guests are grouped into Bride or Groom side.

Step 3
Setup your Seating Plan for your Event. If your Event seating arrangements is only one grouping such as a seminar room, just create 1 seating group. However, if you have multiple seating groupings like tables at a Wedding Event, Create the seating groupings with each group size accordingly. For Example, 20 tables with size of 10 guests each.
Step 4
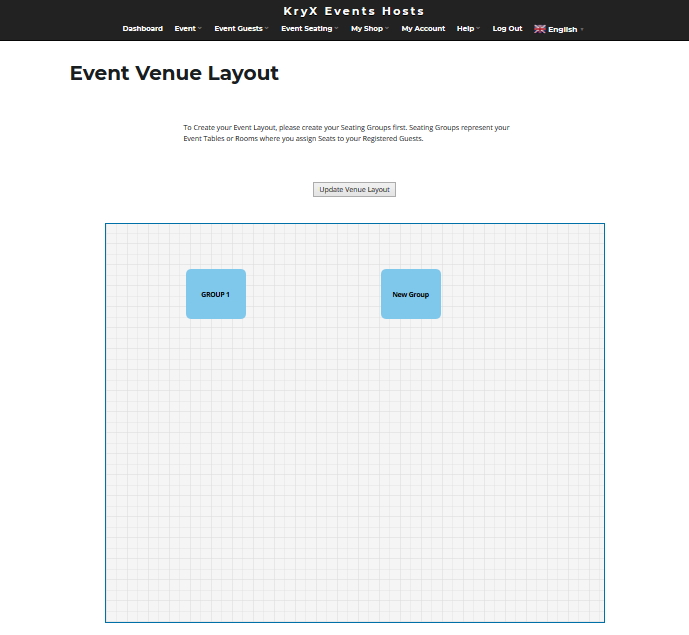
Drag and Drop your created seating groupings to setup your Event Venue Layout. You can arrange the positions of the seating groups as per your Event Venue Floor plan.
Step 5
Start Sending out your Event Registration Links or QR Code to allow your guests or potential customers to register for your event. For every event created, Registration Links & QR Code will be auto generated for you and will be sent to your email address. They can also be found under your event viewing.
On Successful Event Registration, Email notifications will be sent to both Hosts and Registered Guests.
Sample Event Registration Link & QR Code

Step 6
Assign Event Seats to Registered Guests.
IMPORTANT NOTE : Assigning of seats for PAID EVENT also means that payment has been verified. If Payment is not verified, DO NOT ASSIGN Seat.
After Seats have been assigned, registered guests will receive email notification, including the QR Code to be used for Event Admission Ticket.
If your event is a Virtual Event, registered guests will receive email notification on your virtual event details.
On Event Day
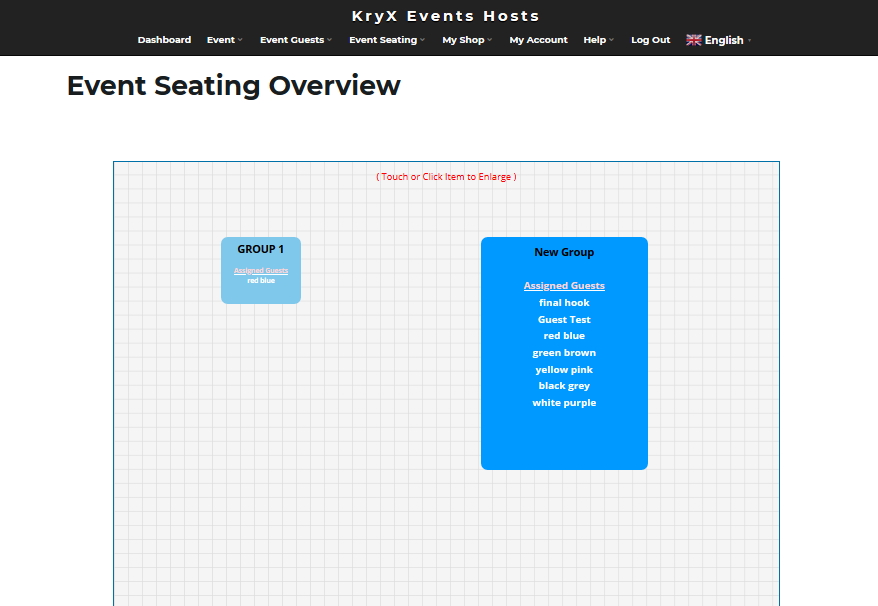
Event Seating Overview
Login to KryX Events Host account to view your Event Seating Overview. Your Registered Guests will appear in their assigned seating groups. Click on seating group to enlarge for viewing if needed.
Event Guests Check In
Login to KryX Events Host account on your mobile device or laptops with camera function. Under Update Event Attendance, click on Check In Scanner to Scan QR Code to process guests check in. If Guests do not have QR Code, Search guests name to update guest attendance manually.

Email notifications will be sent to both Event Hosts and Registered Guests on Successful Check In. Provide checked in guests seating details if any.
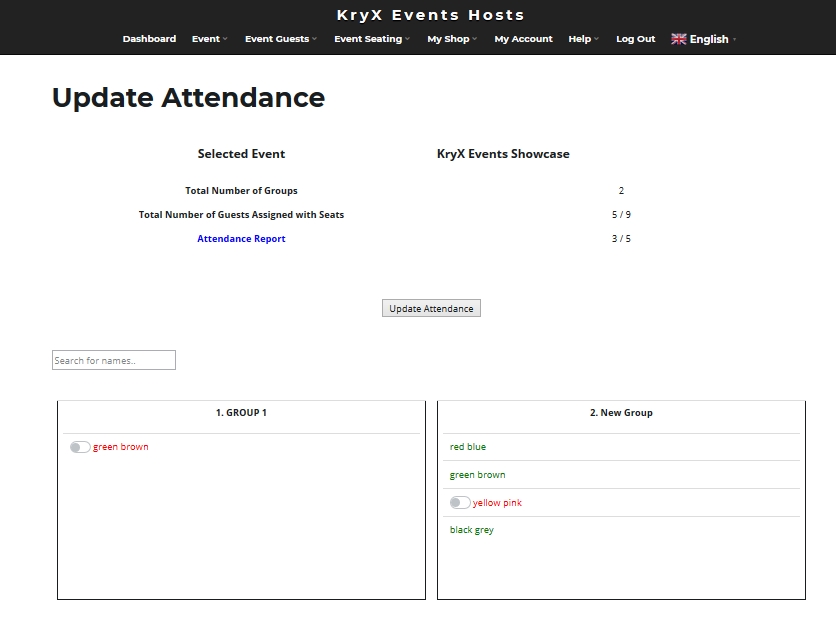
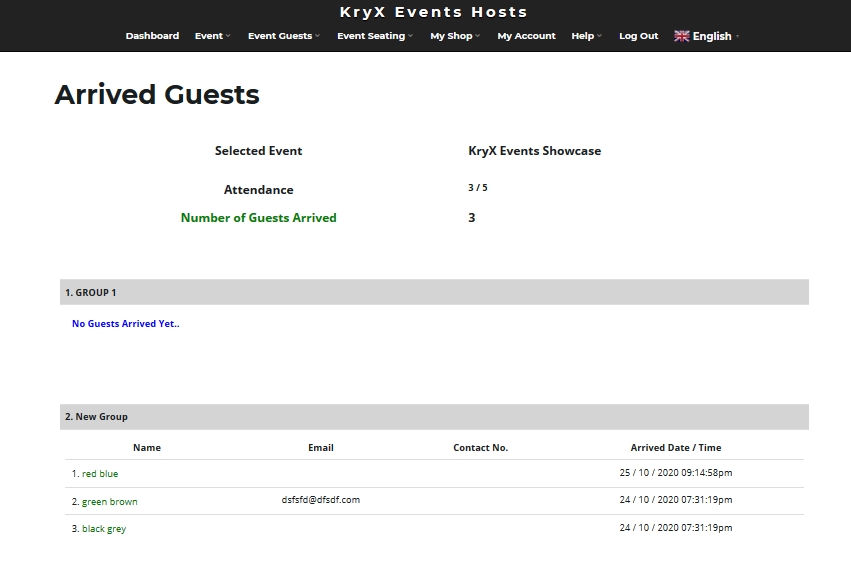
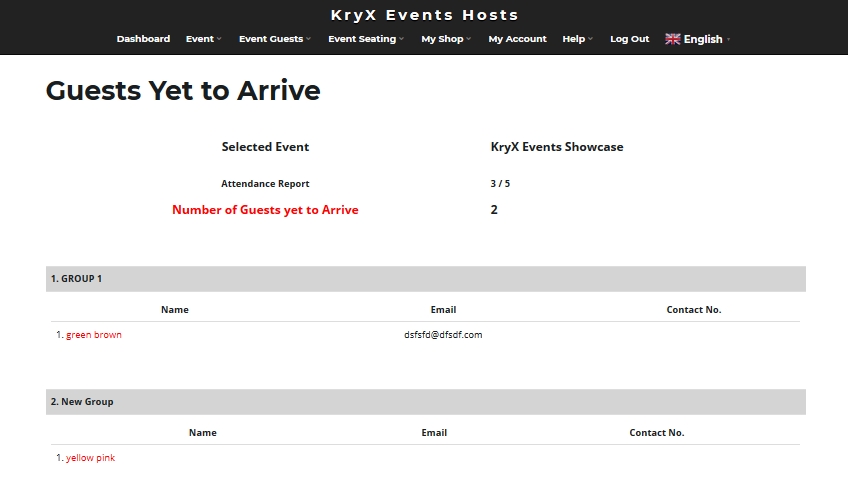
Event Attendance Overview
Instantly view Real Time Event Guests Attendance Report to know who has arrived and who have not. Follow up actions may be carried out such as contacting guests using the registered guests contacts shown